.png%3Falt%3Dmedia%26token%3D2e09362b-83d3-45ba-ba40-6466af68c0a4&w=3840&q=100)
Buffering is a common technique used to improve the performance and user experience of web applications.
In this post, we will explore how to implement buffering in a React custom video player. By the end of this guide, you will have a clear understanding of what buffering is, how it works, and how to implement it in your own React projects.
We will start by explaining the basics of buffering and why it is important in web development. We will then move on to a step-by-step guide on how to implement buffering in a React application, including code examples and screenshots to illustrate the concepts being discussed.
Whether you are new to React or an experienced developer, this guide will provide you with the knowledge and skills you need to effectively implement buffering in your own custom video/audio player. So let's get started!
What is buffering?
Buffering is a technique that is often used in video and audio players to improve the performance and user experience of streaming content.
When a video or audio player streams content, it receives the data in small chunks over the internet. In order to play the content smoothly, the player needs to have a certain amount of data stored in a buffer before it can begin playback. This is because the data is being received at a certain rate, but it needs to be played back at a different rate. The buffer acts as a "safety net" to ensure that there is always a sufficient amount of data available for playback.
If the buffer runs out of data, the player may have to pause playback while it waits for more data to be received. This can result in a poor user experience, as the playback may stutter.
By using a buffer, the player can store a sufficient amount of data to ensure smooth playback, even if the data is being received at a slower rate.
In essence, buffering is important in video and audio players because it helps to ensure that the playback is smooth and uninterrupted, improving the user experience of streaming content.
Create a simple video player using React.js and Chakra UI
Before we do that, we need to configure a new react application with Chakra UI.
Follow this guide to start a new react and chakra UI project: Getting started with Chakra UI and React.js.
If you already have your React.js setup, create a Player.tsx file in the root folder.
Inside the file, render a simple video tag that expects src, muted, and autoplay props.
The video component should have a basic Video styled component with styles that ensure it covers the full height of every parent element it is within.
const Video = styled.video`
  flex-shrink: 1;
  height: 100%;
  object-fit: cover;
  border-radius: 10px;
`;
In the Player.tsx component, return the video element with the three props: src, muted, and autoplay.
interface Props {
  src: string;
  muted?: boolean;
  autoPlay?: boolean;
}

const Player = (props: Props) => {
  const { src, autoPlay, muted } = props;

  const videoRef = useRef<HTMLVideoElement>(null);

  const handlePlayPauseClick = () => {
    if (videoRef.current) {
      if (isPlaying) {
        videoRef.current.pause();
      } else {
        videoRef.current.play();
      }
    }
  };

  return (
    <Flex
      cursor="pointer"
      align="center"
      justify="center"
      rounded="10px"
      overflow="hidden"
    >
      <Video
        autoPlay={autoPlay}
        muted={muted}
        src={src}
        onClick={handlePlayPauseClick}
        ref={videoRef}
      />
    </Flex>
  );
};

export default Player;
This gives us a basic video player with the ability to click to play or pause the video.
It does not include a timeline or any other player controls at the moment - just play/pause.
Import the Player.tsx component into App.tsx and render it there.
// App.tsx
import "./styles.css";
import Player from "./Player";
import { Flex, Heading } from "@chakra-ui/react";

export default function App() {
  return (
    <Flex flexDir="column" px="1rem" className="App">
      <Heading>Video player</Heading>
      <Player src="https://commondatastorage.googleapis.com/gtv-videos-bucket/sample/BigBuckBunny.mp4" />
    </Flex>
  );
}
Add timeline, buffering, and play progress to the video player
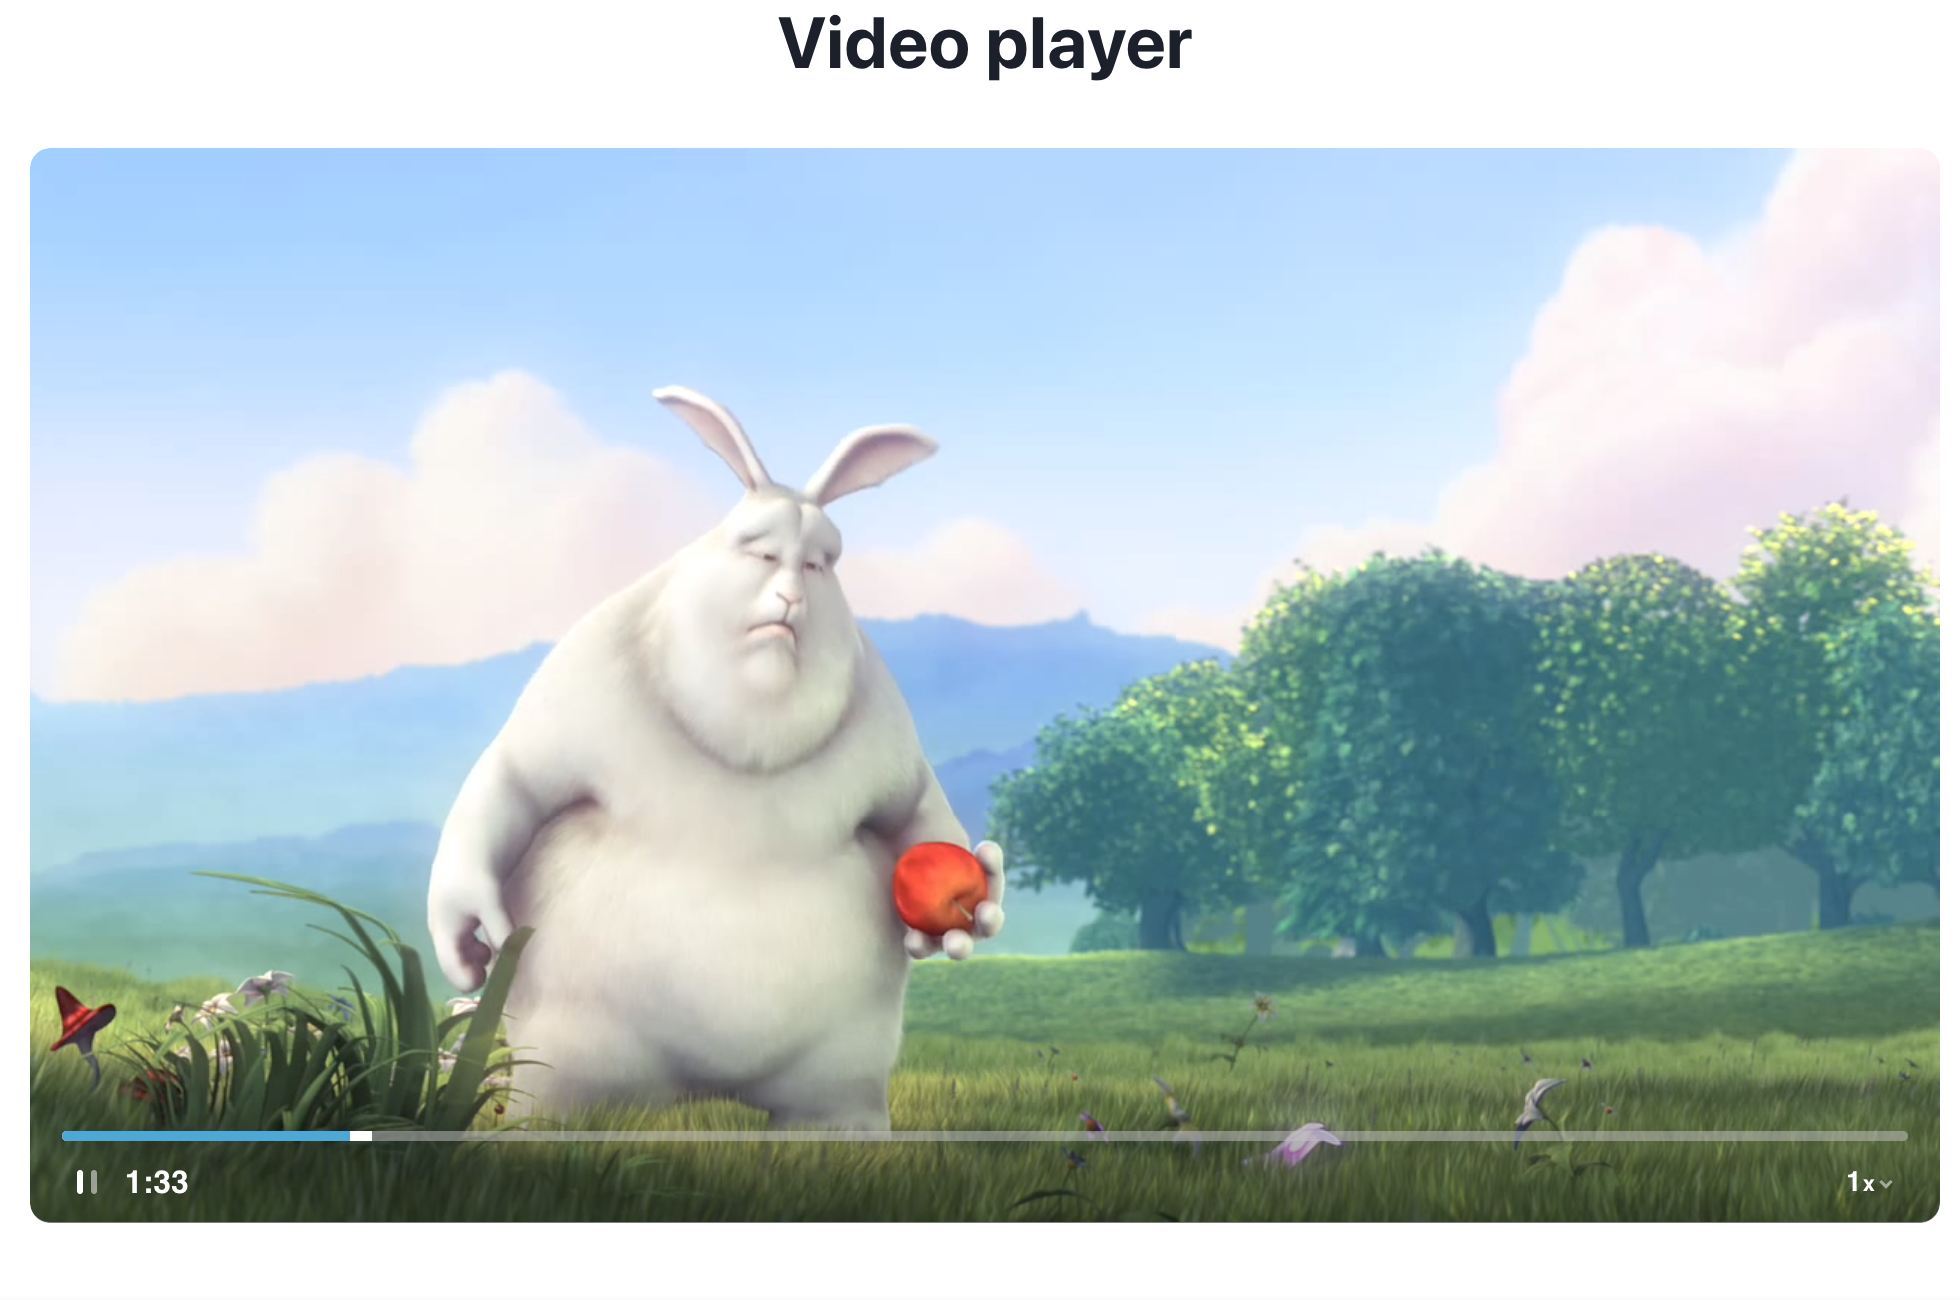
The timeline is where the playback and buffer progress bars are indicated in blue and white, respectively.
We will use React's useRef to create a reference to the Video element, allowing us to manipulate it with DOM methods. We will also create refs for the buffer and playback progress components respectively.
These components get updated as the user interacts with the player or as the playback or buffer changes.
Inside the Player component, add a useEffect hook. This hook will listen for several events on the video element's ref and update the UI accordingly. The events are: waiting, play, playing, pause, progress, and timeupdate.
Quick Summary
waiting: Fired when playback stops because of a temporary lack of data. When this event gets fired, we will set our waiting flag totrue, and set it back to false in other events.play: Fired when the paused property is changed from true to false, as a result of the play method, or the autoplay attribute.pause: Fired when playback is paused.playing: Fired when the audio/video is playing after pausing or stopping for buffering.progress: Fired when loading external resources for the video.timeupdate: Fired when the time indicated by thecurrentTimeattribute has been updated
// Player.tsx
import { Button, Flex, Spinner } from "@chakra-ui/react";
import styled from "@emotion/styled";
import React, { useEffect, useRef, useState } from "react";

const Video = styled.video`
  flex-shrink: 1;
  height: 100%;
  object-fit: cover;
  border-radius: 10px;
`;

interface Props {
  src: string;
  muted?: boolean;
  autoPlay?: boolean;
}

const Player = (props: Props) => {
  const { src, autoPlay, muted } = props;
  const [isWaiting, setIsWaiting] = useState(false);
  const [isPlaying, setIsPlaying] = useState(autoPlay);
  const [durationSec, setDurationSec] = useState(1);
  const [elapsedSec, setElapsedSec] = useState(1);

  const videoRef = useRef<HTMLVideoElement>(null);
  const progressRef = useRef<HTMLDivElement>(null);
  const bufferRef = useRef<HTMLDivElement>(null);

  useEffect(() => {
    if (!videoRef.current) {
      return;
    }

    const onWaiting = () => {
      if (isPlaying) setIsPlaying(false);
      setIsWaiting(true);
    };

    const onPlay = () => {
      if (isWaiting) setIsWaiting(false);
      setIsPlaying(true);
    };

    const onPause = () => {
      setIsPlaying(false);
      setIsWaiting(false);
    };

    const element = videoRef.current;

    const onProgress = () => {
      if (!element.buffered) return;
      const bufferedEnd = element.buffered.end(element.buffered.length - 1);
      const duration = element.duration;
      if (bufferRef && duration > 0) {
        bufferRef.current!.style.width = (bufferedEnd / duration) * 100 + "%";
      }
    };

    const onTimeUpdate = () => {
      setIsWaiting(false);
      const duration = element.duration;
      setDurationSec(duration);
      setElapsedSec(element.currentTime);
      if (progressRef && duration > 0) {
        progressRef.current!.style.width =
          (element.currentTime / duration) * 100 + "%";
      }
    };

    element.addEventListener("progress", onProgress);
    element.addEventListener("timeupdate", onTimeUpdate);

    element.addEventListener("waiting", onWaiting);
    element.addEventListener("play", onPlay);
    element.addEventListener("playing", onPlay);
    element.addEventListener("pause", onPause);

    // clean up
    return () => {
      element.removeEventListener("waiting", onWaiting);
      element.removeEventListener("play", onPlay);
      element.removeEventListener("playing", onPlay);
      element.removeEventListener("pause", onPause);
      element.removeEventListener("progress", onProgress);
      element.removeEventListener("timeupdate", onTimeUpdate);
    };
  }, [videoRef.current]);

  const handlePlayPauseClick = () => {
    if (videoRef.current) {
      if (isPlaying) {
        videoRef.current.pause();
      } else {
        videoRef.current.play();
      }
    }
  };

  return (
    <Flex
      flexDir="column"
      cursor="pointer"
      align="center"
      justify="center"
      pos="relative"
      rounded="10px"
      overflow="hidden"
      _hover={{
        ".timeline-container": {
          opacity: 1
        }
      }}
    >
      {isWaiting && <Spinner pos="absolute" color="white" />}
      <Video
        autoPlay={autoPlay}
        muted={muted}
        src={src}
        onClick={handlePlayPauseClick}
        ref={videoRef}
      />
      <Flex
        w="full"
        h="100px"
        bg="linear-gradient(rgba(0, 0, 0, 0), rgba(0, 0, 0, 0.5))"
        pos="absolute"
        opacity={0}
        transition="opacity 0.5s linear"
        className="timeline-container"
        left={0}
        bottom={0}
        align="flex-end"
        px="1rem"
      >
        <Flex flexDir="column" w="full" align="center">
          <Flex
            w="full"
            transition="height 0.1s linear"
            className="timeline"
            h="4px"
            mb="0.5rem"
            rounded="10px"
            bg="rgba(193, 193, 193, 0.5)"
            _hover={{ height: "5px" }}
            overflow="hidden"
          >
            <Flex pos="relative" w="full" h="full">
              <Flex
                h="full"
                className="play-progress"
                bg="#0CAADC"
                zIndex={1}
                ref={progressRef}
              />
              <Flex
                pos="absolute"
                h="full"
                className="buffer-progress"
                bg="#FDFFFC"
                ref={bufferRef}
              />
            </Flex>
          </Flex>
        </Flex>
      </Flex>
    </Flex>
  );
};

export default Player;
Video buffering
The following code snippet computes the buffer progress percentage and updates the timeline.
...
    const onProgress = () => {
      if (!element.buffered) return;
      const bufferedEnd = element.buffered.end(element.buffered.length - 1);
      const duration = element.duration;
      if (bufferRef && duration > 0) {
        bufferRef.current!.style.width = (bufferedEnd / duration) * 100 + "%";
      }
    };

    element.addEventListener("progress", onProgress);
...
element.bufferedrepresents a collection of buffered time ranges.element.buffered.end(element.buffered.length - 1)gets the time at the end of the buffer range. With this value, we can now compute the current buffer range and update the buffer progress accordingly.
Video play progress
On the other hand, the code snippet below gets the playback progress as the video's currentTime changes and updates the width of progressRef.
...
    const onTimeUpdate = () => {
      setIsWaiting(false);
      const duration = element.duration;
      setDurationSec(duration);
      setElapsedSec(element.currentTime);
      if (progressRef && duration > 0) {
        progressRef.current!.style.width =
          (element.currentTime / duration) * 100 + "%";
      }
    };

    element.addEventListener("timeupdate", onTimeUpdate);
...
Make sure to call setIsWaiting(false) to set the waiting flag to false, so the loader does not continue to run when the player is not buffering.
Track the elapsedTimeSec and duration, as they will be needed to add a time tracker to the player.
At this point, the playback and buffer progress bars should be displayed on the player, as shown below:

How to implement timeline seeking
To allow the user to seek or jump to a specific point in the video, listen for a click event on the timeline using the following handler:
...
  // This is when clicking on the timeline
  const seekToPosition = (event: React.MouseEvent<HTMLDivElement, MouseEvent>) => {
    const { left, width } = event.currentTarget.getBoundingClientRect();
    const clickedPos = (event.clientX - left) / width;
    if (clickedPos < 0 || clickedPos > 1) return;

    const durationMs = videoRef.current!.duration * 1000 || 0;

    const newElapsedMs = durationMs * clickedPos;
    const newTimeSec = newElapsedMs / 1000;
    videoRef.current.currentTime = newTimeSec;
  };
...
With the click event, obtain the dimension from zero to where the timeline was clicked (represented as left) and the width of the timeline.
Use these values to calculate the position. Make sure that the click position is within the range 0=<pos<=1, and if not, return void.
Use the value for clickedPos to calculate the new time in seconds and update the video's currentTime attribute with it.
Add controls to the video player
The play controls include play/pause, playback speed, and time tracker. Create components for PlayIcon.tsx, PauseIcon.tsx, and ElapsedTimeTracker.tsx.
PlayIcon.tsxandPauseIcon.tsxare going to be SVG icon componentsElapsedTimeTracker.tsxwill be a normal react component that returns JSX for the time tracker.
Here are the PlayIcon.tsx and PauseIcon.tsx icon components:
// PlayIcon.tsx
import React from "react";

export default function Play({
  fill = "#FFF",
  ...rest
}: React.SVGProps<SVGSVGElement>) {
  return (
    <svg
      width="24"
      height="24"
      viewBox="0 0 24 24"
      fill="none"
      xmlns="http://www.w3.org/2000/svg"
      {...rest}
    >
      <path
        fillRule="evenodd"
        clipRule="evenodd"
        d="M16.578 12.946C15.2954 14.1729 11.805 16.249 10.0193 16.9156C9.73432 17.0217 9.00774 17.2465 8.85116 17.2496C8.51865 17.259 8.19846 17.0935 8.04365 16.8282C7.98383 16.7251 7.8079 16.0523 7.7516 15.7526C7.58447 14.841 7.49827 13.4252 7.50003 12.0016C7.49827 10.5077 7.59151 9.02478 7.77799 8.12253C7.82725 7.87902 7.97152 7.31862 8.01374 7.22809C8.09291 7.0595 8.23717 6.92682 8.41134 6.84408C8.54504 6.78008 8.6981 6.74574 8.85116 6.75042C9.00774 6.75355 9.6446 6.95179 9.86275 7.02828C11.5833 7.62145 15.2233 9.77249 16.5604 11.0369C16.68 11.1508 17.009 11.4568 17.0635 11.5192C17.1884 11.6597 17.25 11.8299 17.25 12.0016C17.25 12.1608 17.1955 12.3231 17.0829 12.459C17.0248 12.5292 16.6888 12.8414 16.578 12.946Z"
        fill={fill}
      />
    </svg>
  );
}
// PauseIcon.tsx
import React from "react";

export default function Pause({
  fill = "#fff",
  ...rest
}: React.SVGProps<SVGSVGElement>) {
  return (
    <svg
      width="24"
      height="24"
      viewBox="0 0 24 24"
      fill="none"
      xmlns="http://www.w3.org/2000/svg"
      {...rest}
    >
      <rect x="7" y="6" width="3" height="12" rx="1.5" fill={fill} />
      <rect
        opacity="0.5"
        x="14"
        y="6"
        width="3"
        height="12"
        rx="1.5"
        fill={fill}
      />
    </svg>
  );
}
The icon components accept an optional fill prop and spread the rest of the incoming props on the <svg> tag.
Now, create another component for the elapsed time tracker.
// ElapsedTimeTracker
import { Flex, Text } from "@chakra-ui/react";
import React from "react";

type Props = {
  elapsedSec: number;
  totalSec: number | null;
};

export default function ElapsedTimeTracker({ ...props }: Props) {
  const elapsedMin = Math.floor(props.elapsedSec / 60);
  const elapsedSec = Math.floor(props.elapsedSec % 60);

  return (
    <Flex
      align="center"
      className="elapsed-time-tracker"
      fontWeight="600"
      gap="4px"
      transition="500ms opacity"
      mt="-8px"
      p={0}
    >
      <Flex justify="end">
        <Text fontWeight={600} color="white">
          {elapsedMin}:
        </Text>
        <Text fontWeight={600} color="white">
          {elapsedSec.toString().padStart(2, "0")}
        </Text>
      </Flex>
    </Flex>
  );
}
The time tracker expects two props: elapsedSec, for elapsed time in seconds, and totalSec for the video's total duration in seconds.
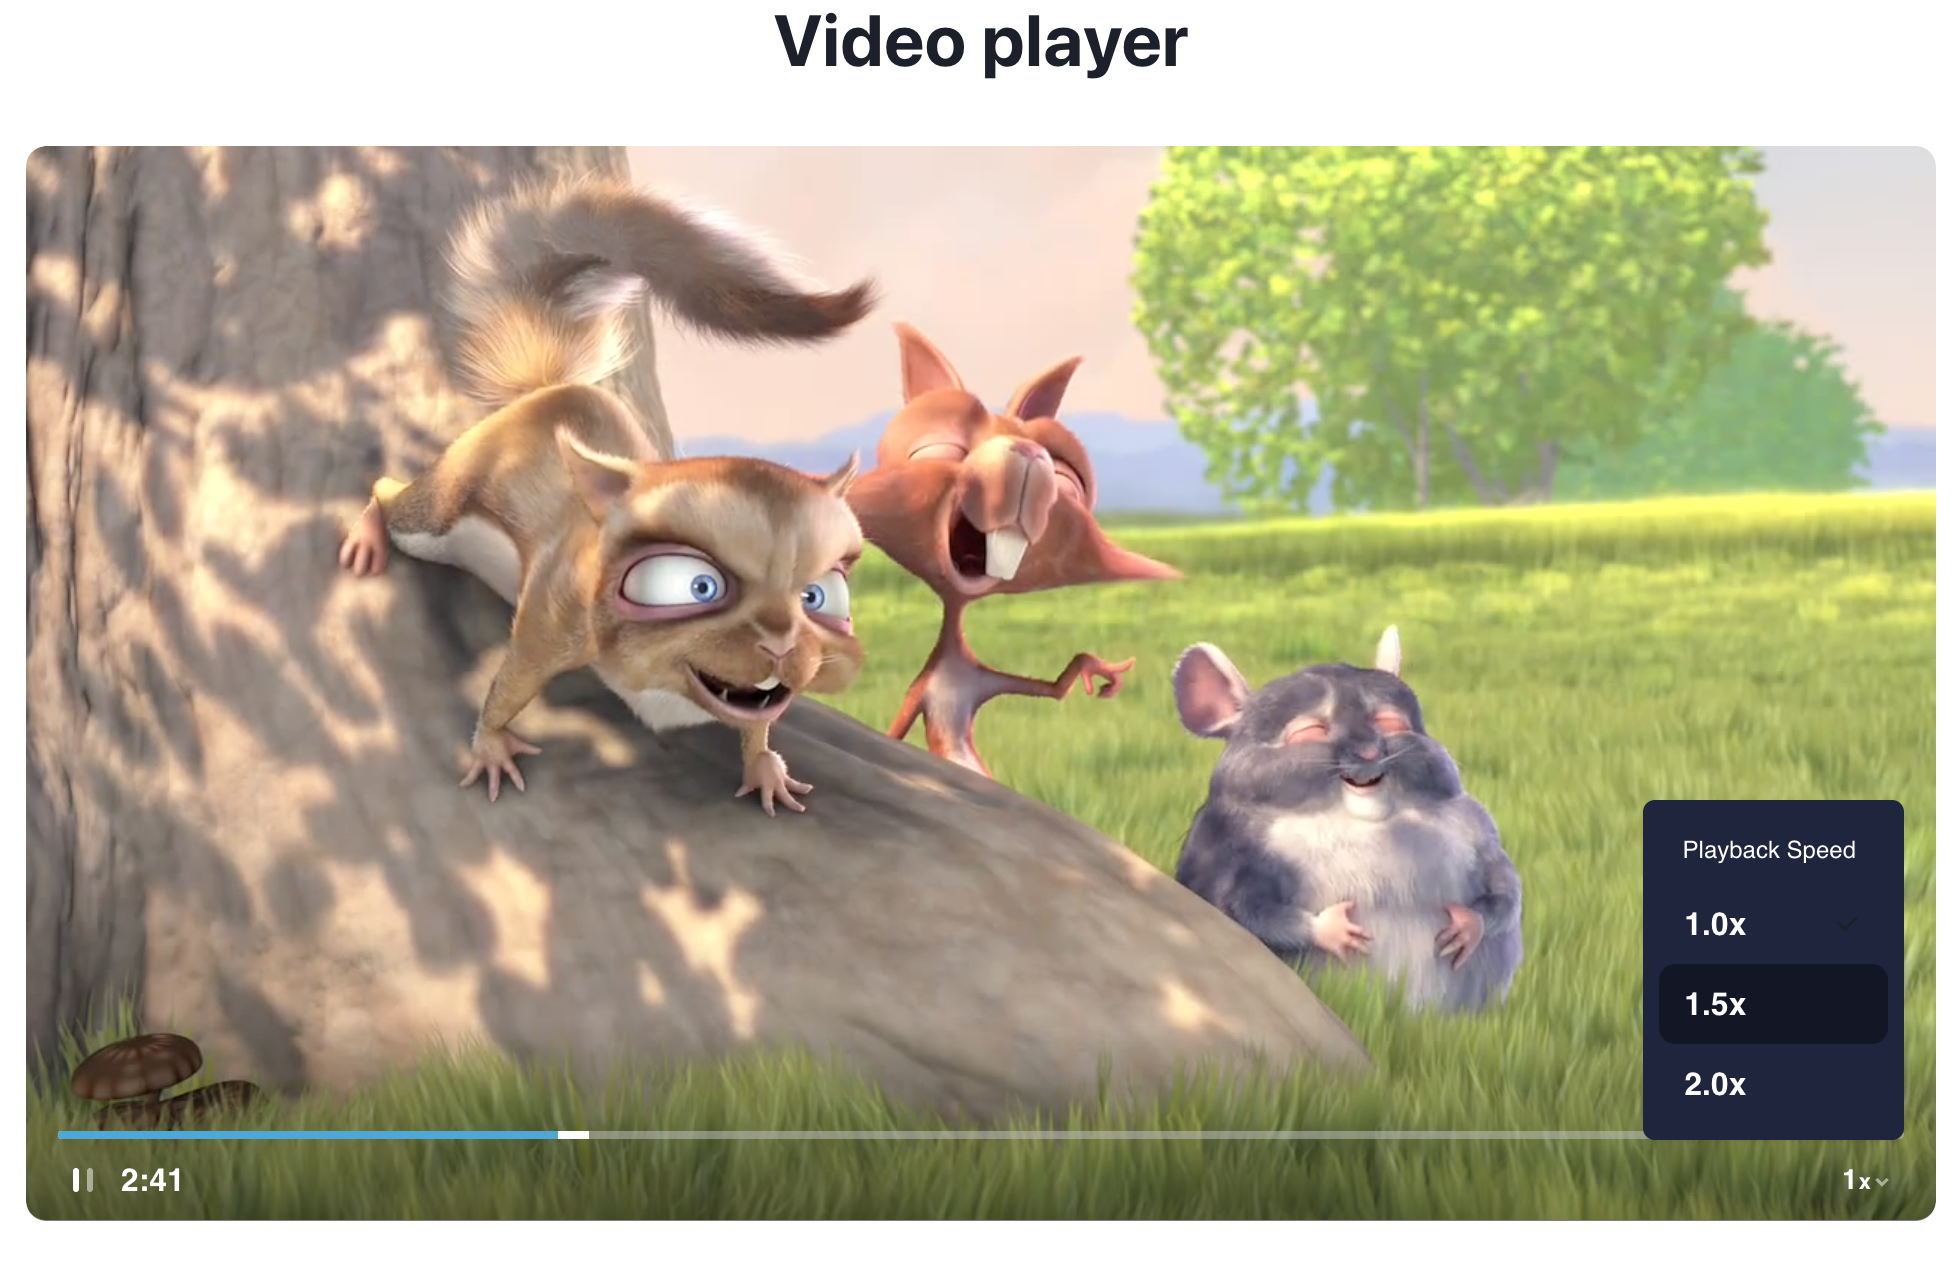
Playback rate (or playback speed):
The playback rate is the speed at which a video plays. In this player, the user will be able to increase the speed, but not decrease it. This is the final feature of the player.
// PlaybackRate.tsx
import { CheckIcon, ChevronDownIcon } from "@chakra-ui/icons";
import {
  Flex,
  Menu,
  MenuButton,
  MenuGroup,
  MenuItem,
  MenuList,
  Text
} from "@chakra-ui/react";
import React from "react";

type PlaybackRateControlButtonProps = {
  onClick?: React.MouseEventHandler;
  playbackRate: number;
};

const PlaybackRateControlButton = React.forwardRef<
  HTMLDivElement,
  PlaybackRateControlButtonProps
>(({ onClick, playbackRate }, ref) => (
  <div ref={ref}>
    <Flex
      className="playback-rate-control"
      alignItems="center"
      cursor="pointer"
      h="40px"
      justifyContent="center"
      rounded="12px"
      w="40px"
      _hover={{
        bg: "rgba(255, 255, 255, 0.08)"
      }}
      onClick={onClick}
      mt="-8px"
      transition="500ms opacity"
    >
      <Text
        color="white"
        fontWeight={700}
        letterSpacing="0.5px"
        pos="relative"
        top="-1px"
      >
        <span style={{ fontSize: "14px" }}>{playbackRate}</span>
        <span style={{ fontSize: "11px" }}>x</span>
        <ChevronDownIcon
          bottom="-1px"
          color="white"
          marginLeft="-1px"
          marginRight="-4px"
          opacity="0.5"
          pos="relative"
          width="12px"
          stroke="white"
        />
      </Text>
    </Flex>
  </div>
));

type Props = {
  playbackRate: number;
  setPlaybackRate: (playbackRate: number) => void;
};

export default React.memo(function PlaybackRateControl({
  playbackRate,
  setPlaybackRate
}: Props) {
  return (
    <Menu autoSelect={false} placement="top-start">
      <MenuButton as={PlaybackRateControlButton} playbackRate={playbackRate} />
      <MenuList
        bg="#1D253F"
        border="none"
        pl="8px"
        pr="8px"
        minW="50px"
        zIndex="2"
      >
        <MenuGroup
          color="white"
          fontSize="12px"
          fontWeight="400"
          ml="12px"
          title="Playback Speed"
        >
          {[1, 1.5, 2].map((rate) => (
            <MenuItem
              height="40px"
              justifyContent="space-between"
              key={`playbackRate_${rate}`}
              onClick={() => {
                if (playbackRate === rate) return;
                setPlaybackRate(rate);
              }}
              rounded="8px"
              _hover={{
                bg: "rgba(0, 0, 0, 0.4)"
              }}
              _focus={{
                bg: "rgba(0, 0, 0, 0.4)"
              }}
            >
              <Text fontWeight={600} size="sm" color="white">
                {rate.toFixed(1)}x
              </Text>
              {playbackRate === rate && (
                <CheckIcon width="15px" height="11px" fill="white" />
              )}
            </MenuItem>
          ))}
        </MenuGroup>
      </MenuList>
    </Menu>
  );
});
The component expects two props: playbackRate and setPlaybackRate. playbackRate is the state variable for the playback speed, and setPlaybackRate is used to set the value of playbackRate.
Finalize Video player
To complete the video player, import the components you just created into the Player.tsx file and render them there.
The final Player component should have the following code:
// Player.tsx
import { Button, Flex, Spinner } from "@chakra-ui/react";
import styled from "@emotion/styled";
import React, { useEffect, useRef, useState } from "react";
import PlayIcon from "./PlayIcon";
import PauseIcon from "./PauseIcon";
import ElapsedTimeTracker from "./ElapsedTimeTracker";
import PlaybackRate from "./PlaybackRate";

const Video = styled.video`
  flex-shrink: 1;
  height: 100%;
  object-fit: cover;
  border-radius: 10px;
`;

interface Props {
  src: string;
  muted?: boolean;
  autoPlay?: boolean;
}

const Player = (props: Props) => {
  const { src, autoPlay, muted } = props;
  const [isWaiting, setIsWaiting] = useState(false);
  const [isPlaying, setIsPlaying] = useState(autoPlay);
  const [playbackRate, setPlaybackRate] = useState(1);
  const [durationSec, setDurationSec] = useState(1);
  const [elapsedSec, setElapsedSec] = useState(1);

  const videoRef = useRef<HTMLVideoElement>(null);
  const progressRef = useRef<HTMLDivElement>(null);
  const bufferRef = useRef<HTMLDivElement>(null);

  useEffect(() => {
    if (!videoRef.current) {
      return;
    }

    const onWaiting = () => {
      if (isPlaying) setIsPlaying(false);
      setIsWaiting(true);
    };

    const onPlay = () => {
      if (isWaiting) setIsWaiting(false);
      setIsPlaying(true);
    };

    const onPause = () => {
      setIsPlaying(false);
      setIsWaiting(false);
    };

    const element = videoRef.current;

    element.addEventListener("progress", function () {
      if (!element.buffered) return;
      const bufferedEnd = element.buffered.end(element.buffered.length - 1);
      const duration = element.duration;
      if (bufferRef && duration > 0) {
        bufferRef.current!.style.width = (bufferedEnd / duration) * 100 + "%";
      }
    });

    element.addEventListener("timeupdate", function () {
      setIsWaiting(false);
      const duration = element.duration;
      setDurationSec(duration);
      setElapsedSec(element.currentTime);
      if (progressRef && duration > 0) {
        progressRef.current!.style.width =
          (element.currentTime / duration) * 100 + "%";
      }
    });

    element.addEventListener("waiting", onWaiting);
    element.addEventListener("play", onPlay);
    element.addEventListener("playing", onPlay);
    element.addEventListener("pause", onPause);

    // clean up
    return () => {
      element.removeEventListener("waiting", onWaiting);
      element.removeEventListener("play", onPlay);
      element.removeEventListener("playing", onPlay);
      element.removeEventListener("pause", onPause);
    };
  }, [videoRef.current]);

  // This is where the playback rate is set on the video element.
  useEffect(() => {
    if (!videoRef.current) return;
    if (videoRef.current.playbackRate === playbackRate) return;
    videoRef.current.playbackRate = playbackRate;
  }, [playbackRate]);

  const handlePlayPauseClick = () => {
    if (videoRef.current) {
      if (isPlaying) {
        videoRef.current.pause();
      } else {
        videoRef.current.play();
      }
    }
  };

  const seekToPosition = (pos: number) => {
    if (pos < 0 || pos > 1) return;

    const durationMs = videoRef.current!.duration * 1000 || 0;

    const newElapsedMs = durationMs * pos;
    const newTimeSec = newElapsedMs / 1000;
    console.log(durationMs, newElapsedMs, pos, newTimeSec);
    videoRef.current.currentTime = newTimeSec;
  };

  return (
    <Flex
      flexDir="column"
      cursor="pointer"
      align="center"
      justify="center"
      pos="relative"
      rounded="10px"
      overflow="hidden"
      _hover={{
        ".timeline-container": {
          opacity: 1
        }
      }}
    >
      {isWaiting && <Spinner pos="absolute" color="white" />}
      <Video
        autoPlay={autoPlay}
        muted={muted}
        src={src}
        onClick={handlePlayPauseClick}
        ref={videoRef}
      />
      <Flex
        w="full"
        h="100px"
        bg="linear-gradient(rgba(0, 0, 0, 0), rgba(0, 0, 0, 0.5))"
        pos="absolute"
        opacity={0}
        transition="opacity 0.5s linear"
        className="timeline-container"
        left={0}
        bottom={0}
        align="flex-end"
        px="1rem"
      >
        <Flex flexDir="column" w="full" align="center">
          <Flex
            w="full"
            transition="height 0.1s linear"
            className="timeline"
            h="4px"
            mb="0.5rem"
            rounded="10px"
            bg="rgba(193, 193, 193, 0.5)" // Buffer color: #FDFFFC
            _hover={{ height: "5px" }}
            overflow="hidden"
            onClick={(e: React.MouseEvent<HTMLDivElement, MouseEvent>) => {
              const { left, width } = e.currentTarget.getBoundingClientRect();
              const clickedPos = (e.clientX - left) / width;
              seekToPosition(clickedPos);
            }}
          >
            <Flex pos="relative" w="full" h="full">
              <Flex
                h="full"
                className="play-progress"
                bg="#0CAADC"
                zIndex={1}
                ref={progressRef}
              />
              <Flex
                pos="absolute"
                h="full"
                className="buffer-progress"
                bg="#FDFFFC"
                ref={bufferRef}
              />
            </Flex>
          </Flex>
          <Flex w="full" justify="space-between" align="center">
            <Flex align="center">
              <Button
                maxW="25px"
                minW="25px"
                w="25px"
                p="0"
                mr="0.4rem"
                maxH="25px"
                h="25px"
                rounded="4px"
                colorScheme="transparent"
                bg="transparent"
                mb="0.5rem"
                _hover={{
                  bg: "rgba(0, 0, 0, 0.4)"
                }}
                onClick={handlePlayPauseClick}
              >
                {!isPlaying ? <PlayIcon /> : <PauseIcon />}
              </Button>

              <ElapsedTimeTracker
                totalSec={durationSec}
                elapsedSec={elapsedSec}
              />
            </Flex>

            <PlaybackRate
              playbackRate={playbackRate}
              setPlaybackRate={setPlaybackRate}
            />
          </Flex>
        </Flex>
      </Flex>
    </Flex>
  );
};

export default Player;
The final version of the video player should include play/pause, buffering, a timeline, seeking, and player controls, as shown in the screenshot below:
 ..
..
Conclusion
With that, we have completed our custom video player with buffering functionality.
If you found this article helpful, consider signing up for our newsletter to receive tips on web development. You can also check out my YouTube channel, FullStack Mastery, for more full stack development content.
Now it's your turn - what do you think of the article and our player? Let me know in the comments below.
Thank you!
.
Further reading